Check-Raised the Flop? Here’s What to Do When the Turn Pairs
In the previous part of this series, we looked at how to approach unpaired brick turns. Now it’s time to cover the brickiest turns of all — the paired ones. This will be the final brick in our “We check-raised the flop, now what?” series (pun intended).
Buckle up — let’s dive in!
Quick Recap of the Action
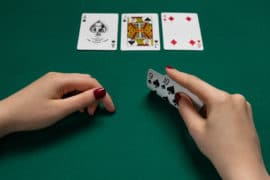
In this scenario, the Button open-raises and you defend from the Big Blind.
The flop comes Js 8s 2d. The Button fires a 75% pot continuation bet, and you respond with a 3.5x check-raise. He calls.
Deep Dive into Pairing Turns
First, let’s define our turns. The non-flush-completing paired turns are 2c 2h 8c 8d 8h Jc Jd Jh. These eight cards make up roughly 16% of all possible turns, so it’s worth studying them — you’ll see one about once every six hands after check-raising the flop.
So why do I call these the brickiest turns? It comes down to the composition of your flop check-raising range.
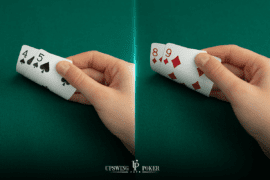
Let’s recap what your bluffing range looked like on the flop. You were check-raising as a semi-bluff with hands like QT, Q9, T9o, 97s, along with flush draws and combo draws. Almost all of those hands completely miss 2s, 8s, and Jack runouts that don’t complete the flush.
Here’s what your weaker portion of the flop check-raising range looked like:
 |
| (a total of 55% weak hands) |
And here the amount of thin value/protection check-raises on the flop:
The solver is meticulous when it comes to range construction, ensuring it still improves to strong hands even on these paired turns. For context, it mixes in tiny fractions of J9+, 8x (especially those containing a spade), and 2x (preferably with a flush draw). Of course, these are incredibly tough to mix in real time since their bluff-catching qualities are already so strong — but the solver doesn’t mind a challenge.
Even with those 200 IQ check-raises in the mix, your range will still struggle on paired turns simply because so many of your hands miss. Here’s a breakdown of your non-made hands on each of the paired turn cards:
| Jack |
 |
| (58.5% non-made hands) |
| Eight |
 |
| (60% non-made hands) |
| Deuce |
 |
| (60.8% non-made hands) |
As you can see, you actually have more non-made hands on these runouts than you did when you first check-raised the flop.
You might wonder: How is that possible?
It happens because your made-hand region has shrunk. You now have far fewer combos of trips than you previously had of top, middle, and bottom pairs — which means your range contains a higher proportion of non-made hands overall.
So it’s no surprise that these turns rank among the most frequently checked ones in the solver’s data, specifically taking the 1st through 5th, 7th, 19th, and 20th spots on that list:

Strategy Breakdown – The High-Level View
When you play poker, your main objective is to maximize how much of your equity you realize. Since poker is a zero-sum game, that also means minimizing how much equity your opponent realizes.
Now, look back at our example. Your range is loaded with weak hands, but not random trash. It’s packed with medium-to-high equity draws — gutshots, open-enders, flush draws, and combo draws.
You also hold the nut advantage on these turns because your flop check-raise range was polarized — strong hands and bluffs — while your opponent called with a more condensed, medium-strength range. That gives you some incentive to keep barreling.
However, that’s a myopic way of viewing EV generation. There’s more to maximizing equity realization than just continuing aggression.
Here’s the problem. Even if you barrel every strong hand in your range, you can’t bet all of your draws without becoming unbalanced — many of them would still end up in the checking line.
At first glance, that might seem fine: barrel your strong hands, add the right number of bluffs, and your betting range becomes essentially unexploitable. That approach would force indifference and maximize the EV of your betting range.
But poker is deeply interconnected, and the solver always considers both sides of the equation. By making your betting range tough to play against, you’d simultaneously weaken your checking range, leaving it full of medium-to-strong draws with unrealized equity.
Note: Want to make more profitable decisions in 30 seconds or less at the poker table so you walk away with more money?
Get Doug Polk's $7 Postflop Playbook and learn an easy-to-use system for winning at poker and start turning those “I don’t know what to do here” spots into money-making situations.

When that happens, the Button can counter by betting nearly 100% after your check, effectively stealing the equity from those draws. The result: your checking line collapses, and the EV of those hands drops to almost nothing.
The only way to prevent that collapse is to “stuff” your checking range with enough strong hands that the Button becomes hesitant to bet as often with his marginal value hands (and, by extension, his bluffs). That hesitation lowers his overall betting frequency — giving your draws more free chances to realize equity.
The tradeoff, of course, is that your value hands don’t get to grow the pot every single time. But a few key facts tilt the balance in favor of this mixed approach:
- Your checked value hands aren’t vulnerable. These are usually full houses or trips with a spade redraw, so the cost of checking and letting your opponent realize some equity with hands that would’ve folded is very low.
- You retain the ability to re-open the action. By check-raising all-in on the turn, you can still deny equity from your opponent’s draws — an option you lose if you always bet your strong hands.
- You can still jam the river. Even after checking the turn, you have the option to ship it on the river, ensuring your value range still gets full-stack realization when appropriate.
Zooming In
Now that you understand the theory behind this dynamic, let’s look at what the solver actually recommends as the unexploitable strategy in this spot.
Compared to what you saw in Part IV of the series, there are some key differences among the three sub-types of paired turns — the 2s, 8s, and Jacks. These differences stem entirely from how much of your range interacts positively with each turn card.
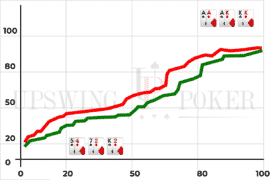
Take a look at the Big Blind’s EV across these turns:

In the upper-left corner, you’ll notice the number 51. I’ve set the EV metric to represent percentage of the pot, so this means the Big Blind’s average expected value is 51% of the pot.
Looking specifically at the 2x, 8x, and Jx turn runouts, here’s what we see:
- 2x turns (excluding spade runouts) produce by far the lowest EV of any turn type.
- Jx turns perform below average, but still noticeably better than 2x runouts.
- 8x turns deliver the highest EV among the three, landing just below the overall average.
When we examine betting frequencies across these runouts, we can see how EV and aggression frequency are directly linked:

As expected, the 2x runouts have the lowest aggression frequency of all, with a 15% betting frequency. The Jx turns come in slightly higher at 22%, while the 8x turns lead the pack at 34%.
So what’s really going on under the hood to create these differences?
Let’s find out.
The Turn Deuce
The 2x turns have the weakest interaction with your flop check-raising range. There are two main reasons for that:
- You rarely check-raise with 2x hands to begin with. Most of these hands perform perfectly well as check-calls on the flop.
- Your top-two hands get devalued. When the board pairs the deuce, your former monsters are now counterfeited. All of the Button’s overpairs have you crushed — for example, AA22 beats your JJ88.
So not only have your draws failed to complete, but your value hands have lost strength. You’re left with a range full of draws, middling pairs, and only a handful of value hands.
Even if you made the mistake of betting your entire value range plus the correct number of bluffs, you’d still end up checking the majority of the time.
Here’s how the solver handles this spot:

At this point, the solver is essentially throwing up its hands and saying, “Alright, I’ve been dealt one of the worst turns in the deck.” It recognizes that many of its bluffs have missed and that it will have to concede the pot often, even checking a large portion of its strongest hands.
But it’s not going down without a fight.
Here’s how it fights back:

The solver responds with a whopping 21% check-raise frequency against the Button’s optimal 33% pot stab.
You’ve successfully lured him into a trap. Trips are always raising, full houses mix raises around 20% of the time, and the top pairs that do check-raise — mainly J8 combos — are doing so as equity-denial plays, not as pure value or bluffs. Their goal is to deny as much equity as possible from the Button’s draws with the remaining stack behind.
Here’s another look at how this strategy plays out:

We see that the A-high and K-high flush draws prefer to check-call, since they already have decent equity. Meanwhile, the Q-high flush draws shift to check-raising, aiming to deny equity from the Button’s K-high flush draws and avoid potential reverse implied odds.
The gutshots simply concede the pot, but the open-enders keep fighting — check-calling about half the time and occasionally donk-shoving when they complete their straight. And no, that’s not a fish move — it’s actually a solver-approved, game-theory-correct line. (Yes, it still sounds like an AI wrote it.)
Finally, the solver check-calls all top pairs and starts mixing with 8x hands to keep the Button’s bluffs in check, pushing him as close to indifference as possible.
The Turn Jack
On the turn Jack, we see a similar surface pattern to the 2x turns — but for entirely different reasons.
Here’s what’s happening:
On the 2x turns, your range lost a ton of value, but your opponent’s also weakened somewhat. Neither of you improved much, and most draws missed.
On the Jx turns, however, things change. While your Jx hands improve, your opponent’s improve even more — and he simply has more of them. Remember, he c-bet big on the flop and called your large check-raise, meaning his range is centered around top-pair hands that now become trips on the turn. The result: his range strength forces you to slow down dramatically.
Here’s a comparison of the Button’s range strength on 2x vs Jx turns:

2x turns – your equity distribution on the left, Button’s equity distribution on the right.

And here are the Jx turns. On the 2x runouts, about 24% of the Button’s range holds 70% equity or more, while on the Jx runouts, that number jumps to 30%.
That difference is the main driver behind your more passive strategy.
Here’s a quick breakdown of how to approach each hand class:
- Full houses: ~33% bet
- Trips: ~50% bet
- 8x: <10% bet
- 2x: ~20% bet
- Draws with an Ace or King: <5% bet — they have showdown and pair value, making them good check-calls versus small sizes
- Other open-enders, flush draws, and combo draws: ~33% bet
- Gutshots: <3% bet — too little equity, other hands preferred
Now let’s move to the last type of paired turn…
The Turn Eight
The turn 8 is the best of the bunch for two main reasons:
- You improve to more trips than your opponent. His flop c-betting range was polarized, so he simply doesn’t have as many 8x hands.
- Your [J8] two-pair upgrades to a full house, completely crushing the Button’s overpair value — especially compared to what happens when the turn is a 2.
Here’s how the equity distribution looks in this spot:

If you recall, on the 2x and Jx turns the Button held 24% and 30% of his range as hands with 70% equity or more. On the 8x turns, that number drops sharply — he now has only 14% of his range** in that elite equity tier.
Since your range gains more equity, you’re naturally incentivized to grow the pot, as you’re favored to win it more often.
There’s another key factor to highlight here: bet sizing.
Looking back at the solver output, you’ll notice that on 2x and Jx turns, the solver heavily favored a 50% pot bet (188 chips). But on 8x turns, it begins shifting toward a larger 75% pot size (282 chips), reflecting your increased equity and value density in these spots.
This all ties back to your nut advantage on each turn card. The smaller your nut advantage, the smaller your optimal bet size — and vice versa.
Finally, let’s look at the range composition the solver chooses to bet with on the 8x turns:
- Quads: 100% bet — they unblock the Button’s hero-calling range
- Full houses: ~50% bet
- Trips: ~50% bet
- Top pair: ~20% bet — mostly [AJs] without the As
- Third pair: ~40% bet — mainly [52s] and [42s] without a flush draw
- Ax and Kx draws: ~10% bet — these have showdown value and good pair outs, making them fine check-calls
- Other strong draws: ~33% bet
- Gutshots: <10% bet
As you can see, betting frequency increases across the board, which aligns with your stronger overall range — more hands worth value-betting and, consequently, more bluffs needed to stay balanced.
Wrapping Up
You now have a clear framework for how to approach the vast majority of turns after check-raising on this kind of draw-heavy flop.
That wraps up both this article and the entire series. I hope you’ve enjoyed the deep dives and picked up some new insights along the way. If you’d like to see more strategy breakdowns like this, let me know in the comments below.
Til next time, good luck, grinders!
To learn more about how to play brick turns after check-raising the flop, read: What to Do After You Check-Raise the Flop and the Turn Bricks Out.
Note: Want to make more profitable decisions in 30 seconds or less at the poker table so you walk away with more money?
Get Doug Polk's $7 Postflop Playbook and learn an easy-to-use system for winning at poker and start turning those “I don’t know what to do here” spots into money-making situations.