What to Do After You Check-Raise the Flop and the Turn Bricks Out
In this part of the series, we’re going to cover how to play on blank turns. We’ll start with the high-level theoretical framework behind the GTO strategies, look at some exact strategies for different hand classes, and wrap up with a dive into the exploitative opportunities that can arise—aka, how to make some juicy EV gains.
Before we get into it, let’s do a quick recap of the action.
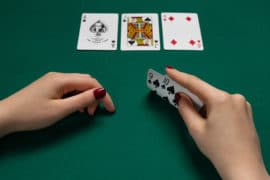
The scenario that we are working with is that the Button opened, and you defended from the Big Blind.
The flop came Js 8s 2d. The Button fired a 75% pot continuation bet, and you responded with a 3.5x check-raise. He called.
Diving Deep into the Blank Runouts
First things first—what exactly is a blank turn?
A blank turn is a card that has minimal interaction with either player’s range. In other words, most of the bluffs on the previous street have missed, leaving each player with a weaker overall range composition.
There are two main types of blank runouts:
- Unpaired blanks – divided into overcards and undercards
- Paired blanks
In this article, we’ll focus on unpaired blanks, saving the paired ones for the final part of the series. Let’s dive in.
Unpaired Blanks – High-Level View
We covered overcard runouts in the previous part of the series, so now we’ll turn our attention to undercard blanks. On our specific board, these cards are:
- 3c, 3d, 3h
- 4c, 4d, 4h
- 5c, 5d, 5h
- 6c, 6d, 6h
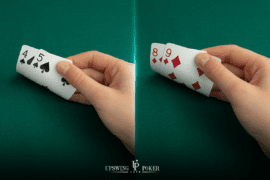
Let’s quickly recap what your bluffing range looked like on the flop. You were check-raising as a semi-bluff with QdTd, Qd9d, T9o, 97s, various flush draws, and combo draws.
It’s easy to see that these hands almost completely miss the 3–6 non-spade runouts. The only minor interaction your range has with these cards comes from a few flush draws that happen to make third pair.
As far as weak hands, this was your starting check-raising range composition on the flop:

(a total of 55% weak hands)
And this is how many weak hands you have on the 3-6 non-spade runouts:

51% weak hands

52% weak hands
52% weak hands

51% weak hands
Let’s start by analyzing the situation from a theoretical perspective—and to do that, we’ll go back to first principles.
In poker, your ultimate goal is to maximize your equity realization. Since the game is zero-sum, this also means minimizing your opponent’s equity realization.
With that in mind, let’s return to our example. You have a range filled with weak hands—but not random trash. Your “weaker” holdings are made up of gutshots, open-enders, flush draws, and combo draws—hands with medium to high equity potential.
Despite that, you still hold the nut advantage on all of these turns. That’s because your check-raise range is polarized (strong hands and bluffs), while the Button’s calling range is more condensed—dominated by medium-strength hands.
The problem is that if you simply barrel all of your strong hands, you won’t be able to “carry” all those draws in your betting line without becoming unbalanced. Many of them would have to stay behind in your checking range—and that’s a big problem.
Here’s why.
If you were to barrel all of your strong hands and mix in just enough bluffs to stay balanced, your betting range would indeed be unexploitable. You’d maximize equity realization within that range, forcing your opponent into indifference when facing a bet.
So far, so good—but poker, like life, is interconnected. A perfectly constructed betting range would come at the expense of your checking range, which would now be extremely weak.
Worse yet, it would be weak but full of potential—loaded with gutshots, open-enders, and flush draws. Against that kind of checking range, the Button could profitably bet 100% of the time, effectively stealing all that unrealized equity. Your checking range’s equity realization would then collapse to zero.

The solver, in all its mathematical glory, has determined that the best way to maximize equity realization (interchangeable with EV) is to protect your weaker hands by mixing in a significant number of two-pair+ hands into your checking range.
By doing this, you disincentivize the Button from stabbing too frequently, allowing your draws—previously having their equity denied 100% of the time—to see the river far more often.
This dynamic arises because the Button no longer has as many high-equity hands to value-bet or as much fold equity when bluffing. With fewer profitable options, he’s naturally less motivated to fire indiscriminately.
If you’re a chess fan, think of it like defending pieces. You position some pieces—your two-pairs and sets—to protect your more vulnerable ones—your gutshots, open-enders, and flush draws—from being taken (or in poker terms, having their equity denied).
Here’s a neat way to visualize this. I’ve filtered the solver output to show only the strategy for two-pair+ hands. On the 3–6 blank runouts, your nutted hands check around 40% of the time, while on runouts where your range composition is stronger, that number drops to just 10%.

Optimal Bet Sizing on Blank Turns
To wrap up this section, let’s talk about optimal bet sizing.
Whenever your range is polarized and your opponent’s range is merged, you generally want to use a larger sizing. This approach maximizes value with your strong hands, creates sufficient room for bluffs (since smaller bets require fewer bluffs to remain balanced), and applies the right amount of mathematical pressure to an opponent holding a bluff-catcher-heavy range.
That said, overbetting at this SPR isn’t optimal. It tends to extract slightly less value, achieves less equity denial, and also diminishes the pair-out value of your draws—especially compared to betting around 75% pot and continuing to barrel on the river.
Solver Approach by Hand Class
Now let’s get our heads out of the clouds and into the nitty-gritty. How does the solver actually approach these turns across different hand classes?
In two words: very passive.
Since all twelve of these runouts behave almost identically, here’s the average solver strategy for each category:
- Two-pair+ – 40% barrel
- Top pairs – 15% barrel
- Middle pairs – 50% barrel (These make excellent merge bets, folding out some top pairs while getting called by stronger draws and blocking the Button’s two-pair+ region).
- Third pairs – 50% barrel
- Typically pair+draw hands, which also function well as merge bets.
- Fourth pairs – 50% barrel
- Also solid merge bets.
- Combo draws – 25% barrel
- Flush draws – 25% barrel
- Open-enders – 25% barrel
- Gutshots – 0% barrel
Exploitative Opportunities
There are two main categories of mistakes your opponent can make in this spot: betting too frequently or not betting enough.
The expected value of checking your strong hands assumes that your opponent will stab at around 60% frequency on these blank turns—betting most of his top pairs and overpairs, along with roughly half of his draws (some more often than others).
All else being equal, if you expect your opponent to check back too often with either of these hand classes, checking yourself only lets him realize equity for free more frequently. Your value hands also miss the chance to grow the pot.
In that case, the optimal exploitative response is to take the initiative—betting your strong hands to ensure that the pot increases and your equity realizes more consistently.
Here’s a snapshot from the solver on the 3c turn. The first image shows the out-of-position player’s GTO strategy, while the second reflects the adjusted strategy after accounting for the new input.

(GTO)

(vs an opponent who stabs only 42% of the time compared to the optimal GTO frequency of 58%)
Conversely, if your opponent is more aggressive than the solver expects, he’s putting money into the pot more frequently when checked to. In that case, it no longer makes sense to slow play your strong hands, nor to slow down with your draws.
For your strong hands, this adjustment works because you have a better opportunity to grow the pot—by checking, letting your opponent overbluff, and then raising to extract maximum value.
For your draws, however, the opposite is true. Against an over-aggressive opponent, you won’t get to realize your equity as often—or as cheaply—as you would in the GTO model.
When it comes to playing draws optimally, the situation gets a bit more nuanced.
If we assume the Button’s strategy remains static GTO in all other nodes—meaning he plays perfectly everywhere except for his turn stab frequency, and won’t adjust to changes in your turn or river strategy—then the best response is to keep barreling your draws.
Here’s why: you’d generate less EV in the checking line (since you’re getting denied more often) while still maintaining the same EV in the betting line, as you’re the one forcing folds and realizing your equity.
However, if the Button is over-bluffing his turn stab but not betting the correct number of value hands, then check-shoving becomes your highest-EV line. In that case, you’ll have him overfolding in a larger pot, and at a higher line frequency than what occurs in GTO play.
Below, you can see the Button’s GTO strategy vs. check, followed by the node-locked version I created to illustrate the adjustment:

(GTO)

(I kept the same betting frequencies for made hands and only increased the betting frequency of the draws)
Here’s the new optimal barreling strategy for the BB:

And here’s how the solver plays against the weaker betting range:

(against a 30% pot stab – we can see a huge check-raising frequency, up to 41% from 23% in GTO and also a check-fold frequency of only 14% compared to 34% in GTO)

(against a 75% pot stab – we can see a 37% check-raise frequency compared to the GTO one of 22%, and a 42% check-folding frequency, down from 60% in GTO).
The Takeaway
I want you to notice two levels of strategic adaptation here:
- Node-level (reactive) – where we see more check-raising and less check-folding against the opponent’s unbalanced turn stab.
- Previous-node level (proactive) – where we strengthen our checking range in anticipation of a weaker-than-optimal turn stabbing frequency.
This two-layered approach is difficult to grasp conceptually and even harder to execute in real time—but mastering it will significantly increase your edge. The first level exploits the leak; the second level magnifies it by increasing how often it occurs.
That’s all for this part of the series! I hope you enjoyed it and picked up something new along the way. In the final installment, we’ll break down pairing turns—the brickest of bricks.
Til next time, good luck, grinders!
To learn more about playing turns after check-raising flop, read: How To Play Overcard Turns After Check-Raising the Flop.