The Next Step After Range Checking: Turn Strategy (Part 2)
In the previous article in this series, you learned that low, connected boards are best played by checking your entire range when you are the out-of-position (OOP) preflop raiser. The question I will answer in this follow-up article is how to proceed after you’ve checked.
In this second part of the series, I am going to cover in detail how to play against a float bet (defined as a bet from in position when the OOP player skips their c-bet).
How to Play Against a Float Bet
For this article, I will cover the Blind vs Blind strategy, as it will be the most frequent scenario you will encounter.
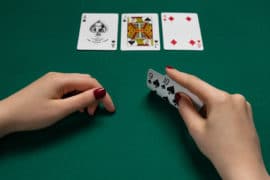
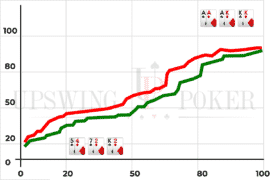
In the previous article, we looked at a 7h 5d 4s flop. On this flop, the Big Blind will have a huge nut advantage. This is due to an unbalanced number of straights and two-pairs, which come in the form of offsuit hands such as 86o, 75o, and 54o.
Furthermore, the Big Blind also holds a slight overall range advantage on this board, which makes an aggressive stabbing strategy optimal. At equilibrium, the solver splits the betting between 33%, 50%, and 75% sizings. Check out how it looks below:

For efficiency and clarity, I’ll focus on how to defend against the intermediate 50% pot stab, as this sizing best illustrates the underlying concepts and is also the one you’re most likely to face both in theory and in practice.
Against this size, you should check-call with a large part of your range, but you should also check-raise at a high frequency to deny your opponent some of his equity. Here is what the overall strategy looks like:

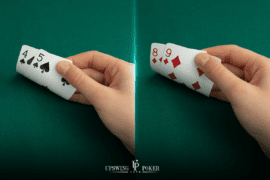
Against this size, we can see that the outline of the defending range is represented by AKo, AQo, AJo, and A9o which are mixed-frequency calls. Other marginal defends are A9s-AKs, with a club (the 4th suit), Q9s-T9s and QJs with a backdoor flush draw.
The bottom of the calling range for made hands is represented by pocket 3s which has a gutshot that pushes it into profitability.
All the other hands in between the A9 and pocket 3s should be part of the defending range.
Next up, let’s look at the check-raising range.
The check-raising range has five components:
- High-value hands (two-pairs, sets, and straights)
- Medium-value hands (top pairs and overpairs)
- Vulnerable hands (5x and 4x)
- Semi-bluffs (open-enders and gutshots)
- Weak bluffs (double backdoor hands with 2 overcards)
Let’s analyze them one by one starting with the high-value hands. Since we are playing out of position with a high stack-to-pot ratio, we cannot check-raise all of those two-pair+ hands for value. Some of them need to remain in the check-calling range to prevent the Big Blind from expanding his betting ranges on the turn*. Thus, the two pairs and sets should be mixed equally between the check-raise and the check-call lines.

*- If you wouldn’t ever check-call with a two-pair or a set, then the check-calling line would remain capped at an overpair and the Big Blind would be able to value-bet more thinly (due to the minimum defense frequency (MDF) concept that is at play in these wide range vs wide range scenarios.
Basically what happens is that you still need to defend a certain percentage of your overall range but since your overall range is weaker, you will be forced to defend with weaker hands, thus allowing an expansion of the value range which will lead to an expansion of the bluffing range while remaining balanced.
This ultimately means that the middling part of your range will be put into an indifference (with an expected value of 0) at a higher frequency (aka losing the pot more frequently).

The second component is the medium-value hands. These hands are well ahead right now but the road ahead is treacherous for some of them that are more vulnerable. If you look at the matrix above, you can discern a pattern for choosing the best overpairs to check-raise. Can you spot it?
The lower the overpair is, the higher the frequency at which we will check-raise it. This is due to the concept of vulnerability. 99 has five overcards to it that will fundamentally change its hand class, while KK only has one overcard to it. Pocket kings will retain their value on many more runouts. This means that 99 has more incentive to check-raise to gain some equity from the bet folding range. Think of hands such as ATo, KTo, QTo, etc. They draw to six overcards to beat pocket 9s.

Now going down to the top pairs. The 7x top pair, while strong at the moment, is very vulnerable to a large number of overcards. That being said, you can’t check-raise with many of them because you can’t rely only on fold equity to make a check-raise more profitable than a check-call. You need to get some value too.
In this case, it’s best to only check-raise with the strongest kickers. These dominate much more of the bet-calling range. You should also check-raise with 87s and 76s, which while not very strong when getting called, have a lot of potential to become a nutted hand due to the open-ender/gutshot equity.

The next component, which is very small, is the medium-strength component made of 5x and 4x. You should only check-raise these with the top kicker at a low frequency. This is a typical solver strategy that seeks to optimize its equity distribution across every possible runout (in the present scenario when the board pairs the 5 or the 4).
These hands are ahead of the Big Blind’s betting range at the moment but highly vulnerable. Check-raising them gains value from the gutshots, open-enders, and two overcards with backdoors while denying equity from hands such as A9o, K9o, Q9o, ATo, etc.


The next big category is composed of semi-bluffs. These hands assist in equilibrating the high-value and medium-value hands so that you force the opponent to defend with weaker hands.
In our case, this range is composed of open-enders (6x) and gutshots (8x). There is a preference towards check-raising with a backdoor flush draw since these hands have a few more runouts that will improve them to a near-nutted hand (aka more equity). You should check-call with these hands too since leaving your range without nuts on those runouts is a recipe for disaster (it’s the same principle that I talked about in the high-value hands section).


The final component of the check-raising range is made of hands that have two overcards, backdoor flush draw, backdoor straight draw, and no showdown value. These are J9s, Q9s, and K9s. These will only be check-raised very rarely and their main role is to become bluffs on the river after the turn goes check-check on certain runouts.
Wrapping Up
This was a very technical article so congratulations if you were able to read it all the way! It would be even better if you’d write what you remembered on a piece of paper or even in a digital document.
The next article in the series will focus on playing against a turn barrel after check-calling. That’s all for this second part of the series! If you enjoy this type of content then make sure to leave a comment down below and I’ll do my best to make more in the future. Also, if you have some questions about the strategy, feel free to ask in the comment section!
Till next time, good luck, grinders!
To learn more about high-level blind vs blind play, read: LLinusLLove vs. AbsoluteTopUp: A Masterclass in Flush Draw Dynamics.