How to Play Flush Turns After Check-Raising (Advanced Strategy)
As you probably know, having a well-balanced check-raising range makes you a really tough opponent to play against.
The reason why is simple: your opponent can’t just start taking mindless stabs at the pot once you check. He’s going to get his equity denied or end up value cutting himself way too often. That forces him to check back more, which boosts the equity realization of your weaker hands.
But what happens after that initial aggression is just as important.
Without a cohesive strategy on the turn, you’re going to end up bleeding money, especially now that the pot is exponentially bigger. Remember, expected value (EV) flows backward from the river to preflop (meaning turn and river strategies are vital).
Today’s focus will be on cornerstone concepts for playing the turn, then we’ll dive deep into playing turns that complete a flush draw.
This is part 1 of a new series on playing turns after check-raising.
The Cornerstone Concepts – Range and Nut Distribution
Whether you were the preflop raiser or caller doesn’t really matter. That idea’s long outdated.
Thanks to solvers, we now understand which variables actually drive the action:
- Preflop ranges and how they interact with the board (this is where nut advantages and range advantages come from)
- Positional dynamics (being in or out of position matters far more than who raised pre)
- Stack-to-pot ratio (SPR shapes what kinds of bets are threatening or commit us)
- Bet sizing—especially block bets and overbets, which play a huge role in shaping turn and river play
How Different Turns Affect the Equity and Nut Distribution
Now, enough high-level theory, let’s look at some actual examples and break down the mechanics behind the optimal strategy.
We’ll focus on Big Blind vs Button, since it’s by far the most common check-raise spot you’ll encounter.
Playing from the Big Blind against the Button
In this scenario, the Button open-raises, and you defend from the Big Blind.
The flop comes Js 8s 2d. The Button fires a 75% pot continuation bet, and you respond with a 3.5x check-raise. He calls.
At this point, the turn card can drastically shift the dynamic, and your strategy needs to shift with it.
This article kicks off a new series on how to play the turn after check-raising the flop, focusing on five of the most strategically relevant turn types:
- Flush-completing turns
- Straight-completing turns
- Overcard turns
- Blank turns
- Pairing turns
We’re starting with Part 1: Flush-Completing Turns, where your range and nut advantage are often at their peak, and aggressive play is the name of the game.

#1 – Flush-completing turns
Flush-completing turns are, on average, your best-case scenario. That’s because a huge chunk of your flop check-raising range consists of flush draws and one-card backdoor flush draws. When these improve on the turn, your overall equity shoots up with them.
These turns are usually so favorable that you’ll actually have the range advantage, which is rare. Spoiler: this won’t be the case on most runouts.
So we’ve nailed down the first part of the puzzle: range advantage. Now let’s look at the second key factor—nut distribution.
To understand how that distribution plays out, we need to revisit the mechanics behind flop check-raises.
On the flop, the Button will look to press his nut advantage by fast-playing his strong hands using a large size, to lower the EV of your many draws as much as possible. That’s his way of protecting his edge, and it’s important for understanding what kinds of hands actually reach the turn.
In response, you check-raise with a highly polarized strategy—mostly two pairs and sets for value. Only a few hands are strong enough to check-raise for value, and your bluffs are built around your best draws.
After facing this check-raise, the Button continues with his strong made hands (top pairs and overpairs) and strong draws.
Because of this dynamic, you retain the nut advantage on the turn. While his range is heavy on top pairs and overpairs, yours contains the two pairs, sets, and now-made flushes.
So, back to flush-completing turns. On these, you hold both the range and nut advantage. This means we can expect the optimal strategy to be highly aggressive, with the optimal bet size being towards the smaller side of the spectrum.
Let’s pull up the solver and see if the data backs this up.

Bet-sizing legend: 124 = 33% pot, 188% = 50% pot, 282 = 75% pot, 812 = 212% pot (all-in)
So why is the optimal bet size a small one? I kept you in suspense for a reason.
It all comes down to the disadvantages of playing out of position. There are two key ones:
- You don’t get to realize your equity for free when you’d like to.
- You have to prevent the in-position player from realizing his equity for free.
Now think about your range: you’ve got a bunch of thin value hands, like two pairs, that can’t profitably bet large. But if you check, your opponent gets a free shot to improve, and sometimes he’ll outdraw you.
So what’s the solution? Bet small.
That small sizing lets you extract value and deny equity from the hands that still have outs against you. It threads the needle between protection and value.
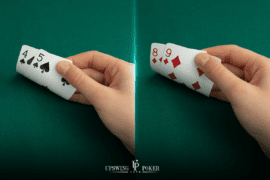
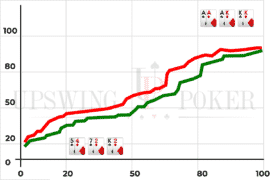
Case in point: say you have Jh 8h on the 4s turn. Here’s what the solver recommends:

The lightest color represents a 33% pot-sized bet, which is the solver’s preferred bet size in this situation
We see that the solver chooses to bet 33% pot almost every time with Jh 8h, and the same goes for all combos of J8s.
Now let’s flip it and look at how the Button is supposed to respond to this strategy:

Take a look at the Button’s folding range—specifically his Jx region.
You’ll notice that the solver has the Button folding some KJ and QJ, and folding the majority of JT and J9 combos.
These hands are the ones that drive the range vs. range dynamic in this spot. They’re just strong enough to compete with your value hands, but not strong enough to call comfortably once you apply pressure.
Hands like 8x and 2x don’t really move the needle. Those combos often get turned into bluffs when you check, but that’s a topic for another day.
What matters here is this: checking and letting those Jx hands realize their equity for free may only have a small impact in each individual hand, but across thousands of hands, that small edge becomes a significant EV leak.
The reason you’re able to block bet so effectively in this spot comes down to having both a range advantage and a nut advantage.
If you lacked one—or especially both—of those edges, the Button could exploit you by raising aggressively and folding almost nothing. Your range wouldn’t be strong enough to fight back.
But thanks to those twin advantages, he’s handcuffed.
To see what I mean, look back at the previous image showing the Button’s response to your block bet. He doesn’t raise at all.
Why? Because if he starts raising here, he caps his own get-to-river range, which opens the door for you to exploit him later. In other words, the Button has no good raise candidates, and the solver knows it.
Departing Ideas
Before wrapping up this first part of the series, I want to leave you with a quick cautionary note—and a nifty trick.
If you’ve been following my articles, you’ve probably noticed I’ve been harping on flop strategy quite a bit. And for good reason. Your turn strategy is only as good as the range you arrive with—and that range is built on your flop check-raising strategy.
If you’re not getting to the turn with a range that closely mirrors the solver’s check-raising output, then the “optimal” turn strategy I’ve laid out here won’t apply. Garbage in, garbage out.
Now for the trick I promised.
If you look at the solver’s output for this spot, you’ll see that it barrels about 85% of its range on the turn. That gives you permission to simplify your strategy by just range betting the turn.
And here’s the kicker: even the solver can’t exploit that strategy for more than 2 big blinds per 100 hands—and that’s in a pot worth nearly 40 big blinds. That’s just 0.5% of the pot in EV loss.
In other words, it’s a perfectly acceptable simplification that makes your life way easier—and your strategy still incredibly tough to play against.
Wrapping Up
That’s all for part 1 of this series! (Read part 2 here.)
If you enjoyed this kind of advanced strategy breakdown and want to see more content like it, drop a comment below—I’d love to hear your thoughts.
I had a blast writing this one, and I’m looking forward to reading what you have to say.
Until next time, good luck, grinders!
If you’d like to learn more about how to apply postflop aggression, read: Mastering the Donk Bet (3 Pro Tips for Max EV)